Table of Contents
I like organizing, a lot. Some might even call it an obsession.
Having your computer, especially your fonts, organized is crucial to being as productive as you can be.
This is the last post in my beginner’s guide to purchasing fonts series and if you haven’t checked out the first three, I would highly recommend you do so!
FONT TERMINOLOGY
FONT LICENSES
FAVORITE SITES TO GET FONTS
I’m not going to lie to you and say this process is super quick, because it’s not. When I first started purchasing fonts, I spent hours organizing them. But you want to know a secret? I only spend maybe five minutes now on the up keep to make sure it stays organized.
downloading the fonts
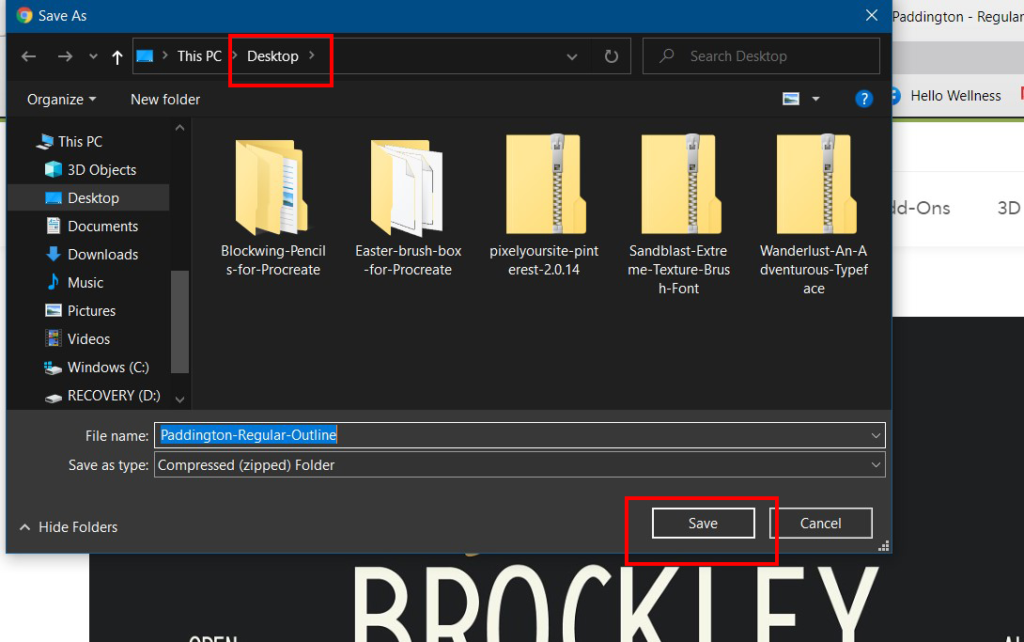
Whether you’re downloading fonts from Google, Creative Market, or any other font website, you’re most likely going to be downloading a zipped file folder. To download this zipped file folder, just select download and follow the prompts from there.
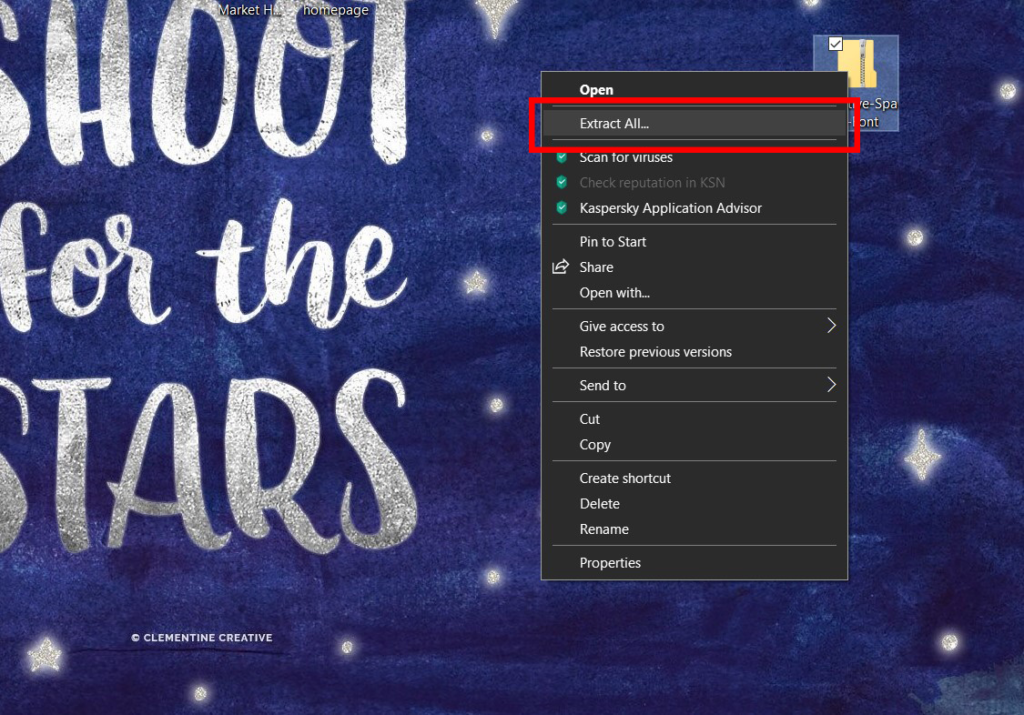
I personally save this zipped folder to my desktop. To unzip a folder, right click on the folder and select Extract All. From there, in the destination section, make sure it says desktop. If the zipped folder is on your desktop, the destination box will already route to the desktop. Then hit extract.
Now on your desktop, you’ll see two folders with the same name. One is still zipped and one isn’t. The zipped folder will be the one with a zipper on the manila folder icon. Delete the zipped folder.
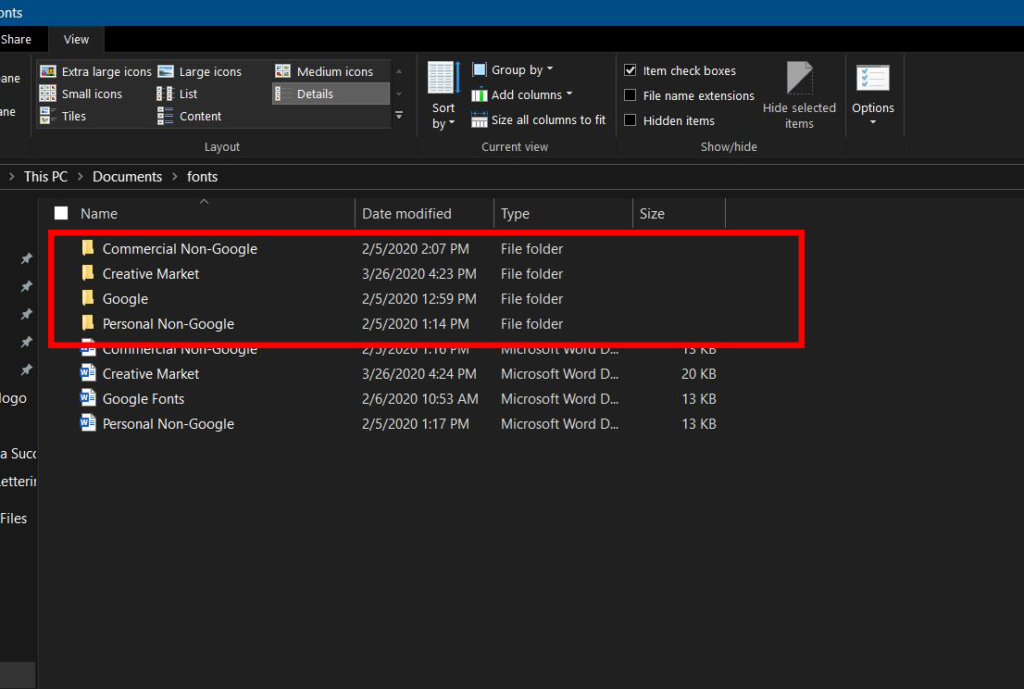
Before installing each font, make sure to create a Fonts folder where ever you would like it to be and store all your fonts in there. If you’re unsure where to move the folder, I have my Fonts folder in my Documents folder.


installing each font
Once you’ve created the main Fonts folder, you’ll want to create a folder for each website you downloaded fonts from and move the downloaded fonts from your Desktop to the website folder.
Generally speaking, each font downloading website has different license agreements. Separating your fonts based on website makes it easy to go back later and see which ones are personal use only and which ones are commercial use.
SIDE NOTE: If you’ve downloaded fonts in the past from random font websites, check and see if all of them are personal use only. Some of them may be public domain fonts, in which case, you can use them for commercial uses. The quickest way to tell if it’s a public domain font, is by checking to see if you have the Open Font License for that specific font. Open Font Licenses give you permission to use that font on a document or graphic that you make a profit off of.
In my fonts folder, I also have a few personal and commercial use fonts that I downloaded years ago, before started blogging.
Once everything is moved, double click on the font file (it’s either a TrueType or an OpenType file) and click install. This process only installs one font at a time so you’ll have to do it for every font you downloaded.
TIP: I will usually do everything for one website before moving onto the next one. It helps to minimize the amount of windows I have open at once.

keeping your fonts organized
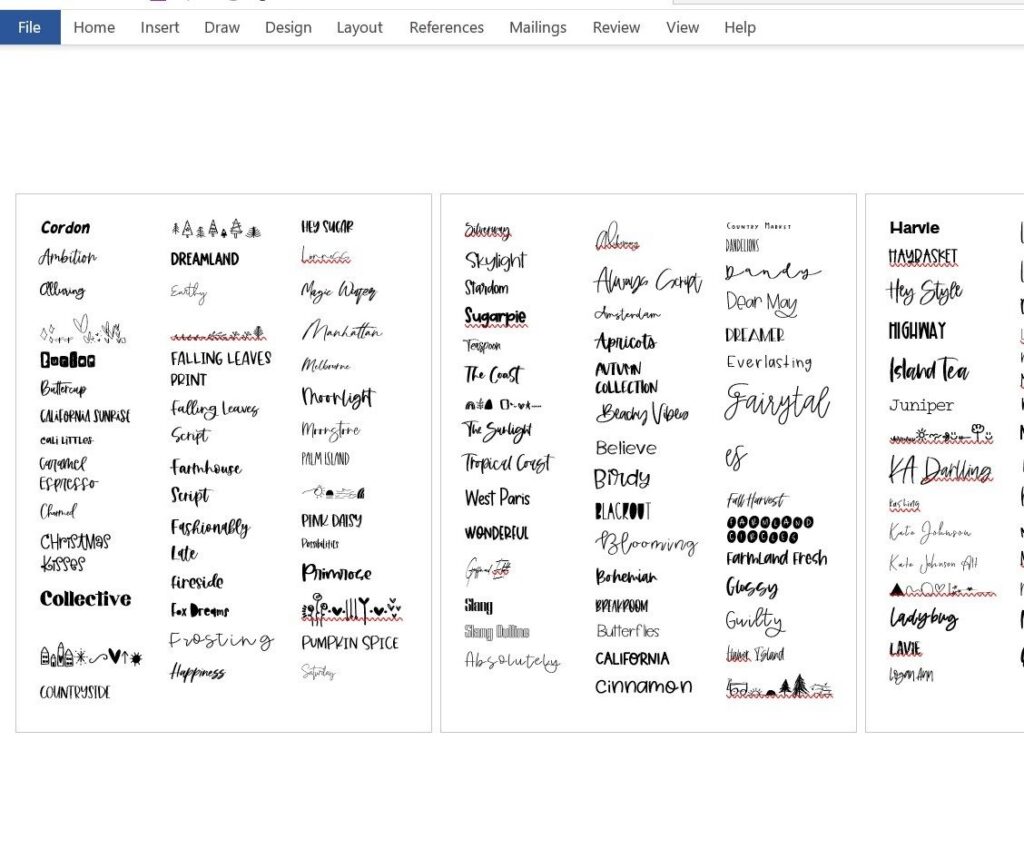
This is probably my best kept secret. I create a Word document that lists all the fonts I have. It makes showing your fonts to your clients easier. After you’ve installed all the fonts to you computer for a specific website, open a blank Word Document. This document will act as a lookbook of the fonts. Instead of having to try each font to know what it looks like, you can simply go to this document and look. Within each Word Document, I’ll type the name of each font in the font itself. This helps to easily know the name of each font and what it looks like without having to click on the text.
TIP 1: Within your Word Document, set the columns to three and the margins to narrow, that way you’re using the most of the Word Document. This also reduces the number of pages you have and it’s easier to view the most fonts at one time.
TIP 2: OpenType files aren’t designed to be used in Word so it will sometimes not show up. If this happens, open the folder for that font and install the TrueType file for that font.
I make sure to do this process for each website’s folder of fonts.

Purchasing and downloading new fonts is a continuous process.
With each new font I download, I don’t allow myself to use the fonts until I move the font folder to the appropriate website folder and type them into the Word Document.
How do you keep your fonts organized? Do you want any other computer organizational posts? Let me know in the comments below!
The rest of the posts in the series:
FONT TERMINOLOGY
FONT LICENSES
FAVORITE PAID FONT WEBSITES

